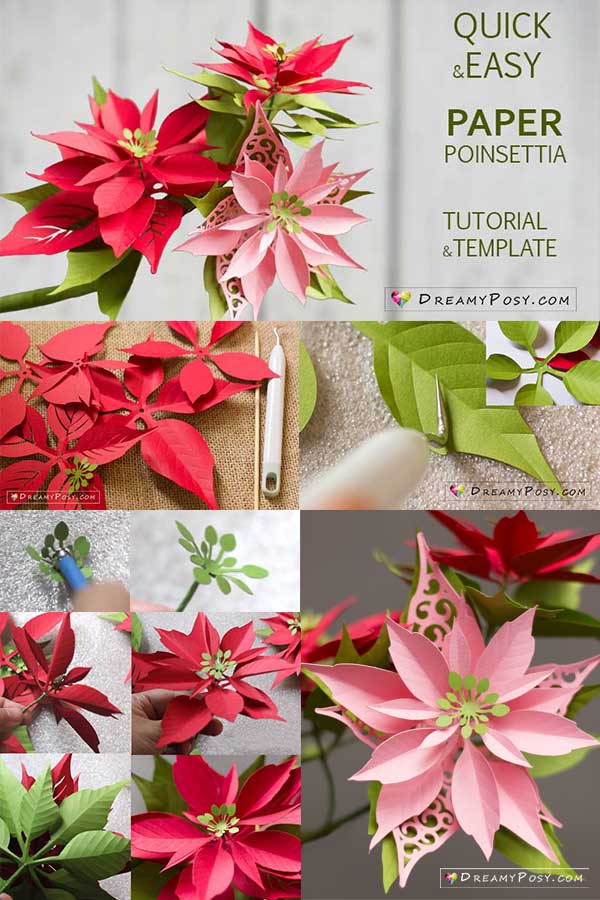

Paper Poinsettia could be last for years, and here is the super quick and easy method to make these Christmas crafts.
Let’s grab your cardstock and some simple suppliers and DIY the flowers.
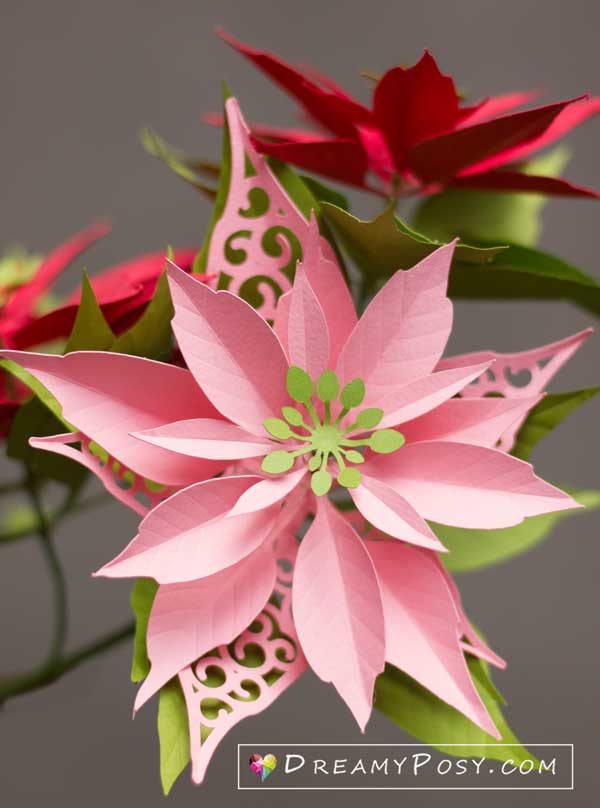
There’s has been many tutorial to make paper Poinsettia, but here is the secret to make the realistic Poinsettia flower:
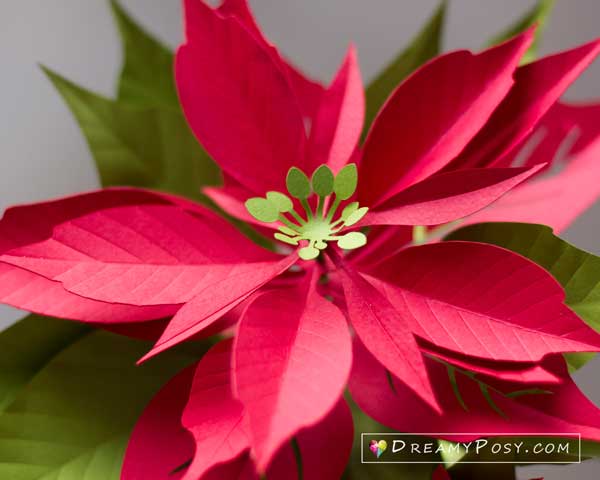
It’s the distance between the layers.
And the secret to super quick and easy is making the 5-petal-petal templates.
We have 2 templates for small Poinsettia flower and for the large one here.
For the small one, with original template size, the largest layer of petal is about 5.5″. But you can adjust the layer to full 12×12″ paper mat size.
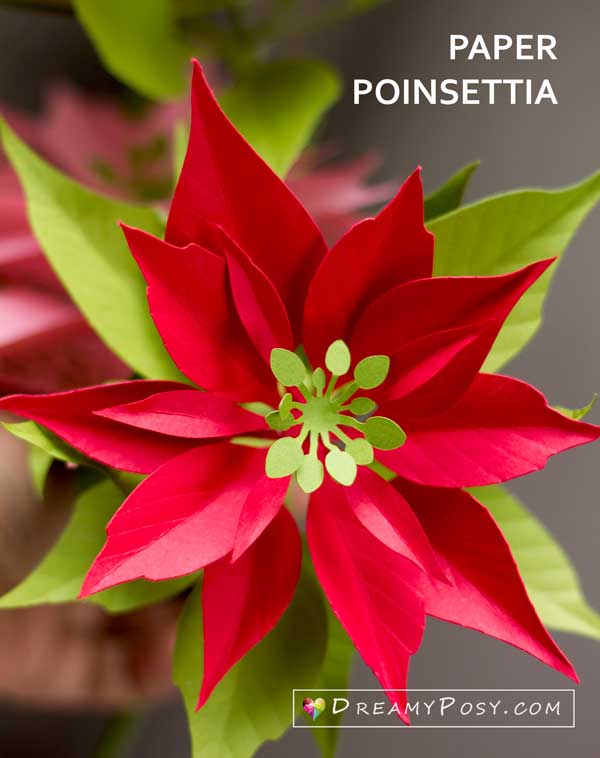
I designed these templates from real flowers to ensure the realistic.
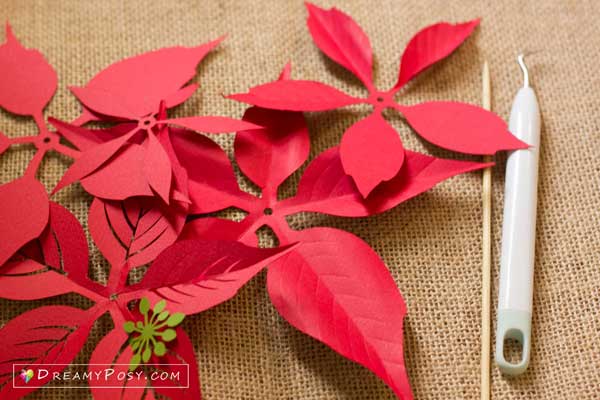
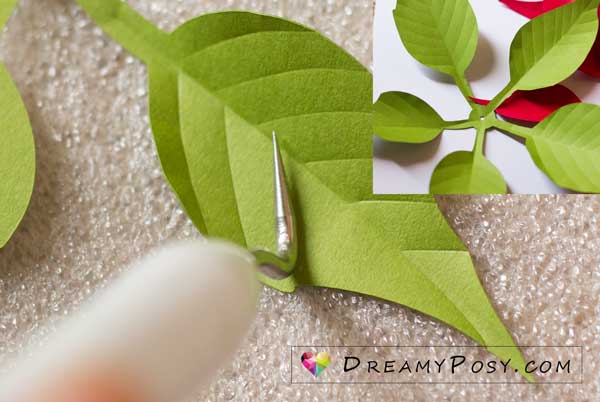
I use the Cricut mock tool, but you could use the out-of-ink ball pen or the edge of the scissors to score the vein.
Try to create the main veins from the center point to strengthen the petals/leaves.
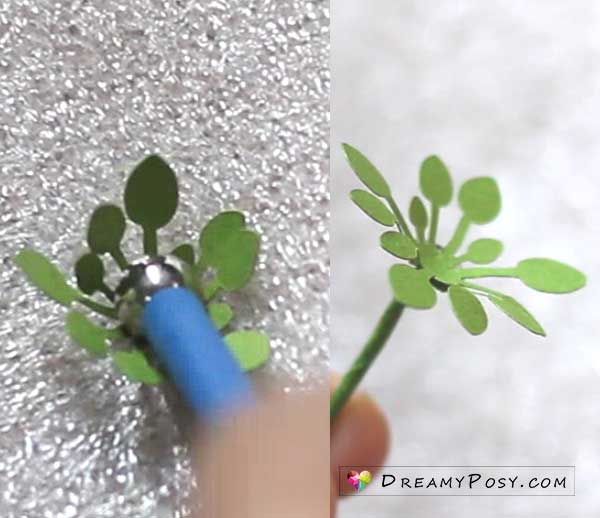
Use the small ball to create the curves for the stamen.
Make the small round at the head of the floral wire gauge#20 and glue the stamen on by the glue gun.
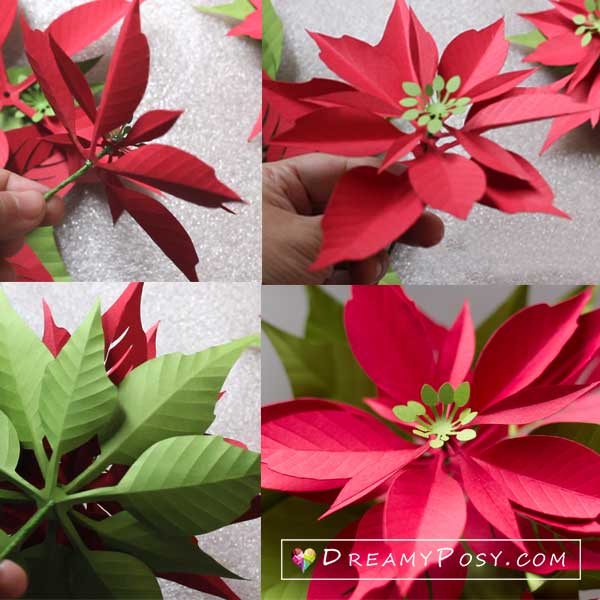
Then insert the petal layers into the floral wire and glue it by the glue gun.
Please insert in the order from the smallest petals to larger ones, from red to green.
The distance between the stamen and the first layer is just about 1mm.
This number is about 5mm (or about 1/4inch) between the other layers.
And that’s all. Super quick and super easy, right? 🙂
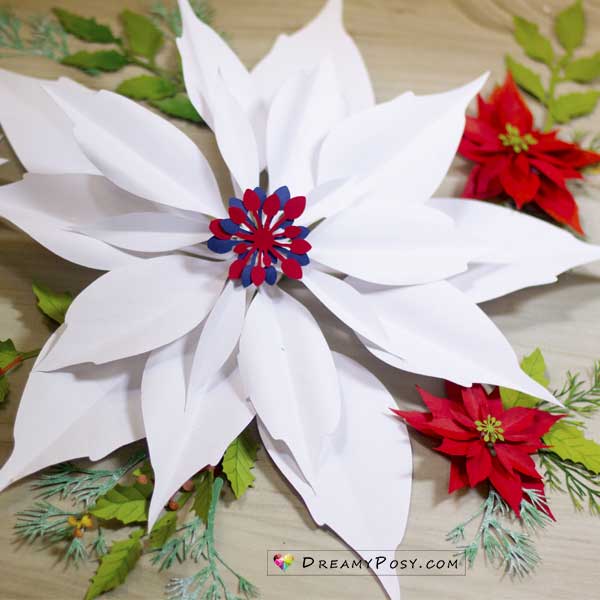
And here is my tutorial and template for paper large Poinsettia
Quick step by step in pictures